Ghetto Hard Drive Selector
Note: The information in this article was originally published in 2003 and may no longer be actual.
Here's our fourth Howto, this one was kindly provided to us by Reed! Big thanks go out to him.
He made this guide about a hard drive selector that he made a couple of months ago to accommodate his experimentation with Linux. It is very simple and cheap, it only accommodates two operating systems on two different hard disks but works flawlessly. Perfect for someone like he who uses Windows for gaming and Linux for business.
Items Needed:
-DPDT Switch (Dual Pole, Double Throw - $3.50 here in the U.S.)
-Two LED connectors (Like those used in a computer case for the HDD and Power LEDs, I had a couple laying around)
-Two IDE Hard Drives
-Multimeter
-Wire Strippers
-Heat Shrink or Electrical Tape
-Drill or Utility Knife
1) Use the multimeter to find the pairs of terminals that are closed by the switch in each position. The switch I used has two rows of three terminals so this was pretty easy to figure out.
2) Cut off the LED so all that is left is the little black two-pin connector and two wires of the desired length, depends on your configuration.
3) Drill or cut a hole to mount the switch, I mounted mine in an unused 3 1/2" drive cover plate.
4) Connect the two wires from one of the connectors to the center terminal and to one of the outside terminals on the switch, do the same for the other only use the opposite outside terminal from the first. Use heat shrink or electrical tape to insulate any bare wires or terminals, you don't want to accidentally fry your hard drive. SPDT (Single Pole, Double Throw switches don't seem to work, though, in theory, you would think it would) The Connections should look like this:
X X O
O X X
Where X is a wire connected to a terminal and the O is the open terminal, you don't want the drives connected to the same side.

This is the back, mine had screws so I didn't bother with heat shrink or electrical tape. I should probably use something, needs dusting too. The Yellow and White wires go to one hard drive and the Orange and White on the other side are going to the second hard drive.
5) Place the connectors on the hard drives in the master position. (I use IBM hard drives, works fine, don't know about others)

6) Enter BIOS and disable the slave device on the Primary IDE channel. (In my BIOS, I set this to none) I believe Windows XP kept seeing the drive even though the slave was disabled, this can be edited using the administrative tools. (More info about this at the end of this page)
7) Let the computer boot, if the disk you have selected isn't the one desired, turn off the power, flip the switch and power up once again. You can install an operating system as you normally would on the nonbootable disk at a later time.
8) You have to power down completely for this to work but so do the others you can purchase. I used a simple toggle switch but you can use either an illuminated toggle switch for an automobile or maybe one of those keyed lock switches like the one here , that is where I got the idea.
Be sure to label which position is for which operating system. I had one of those Romtech TRIOS hard drive selectors but I also fried a quality PSU while using it. Mine uses no power, just the switch to close one jumper or the other, the BIOS does the rest by sensing which drive is identifiable.
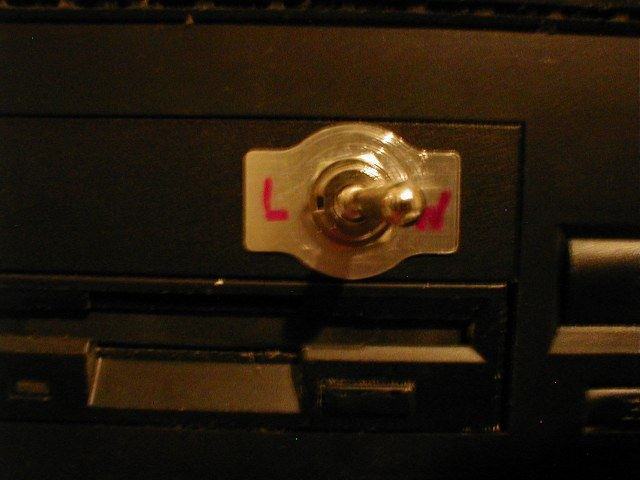
L for Linux and W for Windows, of course. This was supposed to be a temporary switch, I moved on to other things though, and haven't gotten back to it.
I didn't want to totally remove it from my system but I have made photos of the front bezel and the wiring behind the switch, the only other thing to know is that the LED connectors will be placed where you would normally put a jumper, preferably wherever you would put the Master jumper. Some drives may need a different configuration but I imagine it would work for most drives. I don't think Linux had a problem with the other drive being present like XP did. Evidently, XP sees whatever is on the IDE cable even if no jumpers are installed on the hard drives. I included a rough diagram to clearly illustrate the wiring of the switch.
Removing Slave Drive From XP
You must be logged on as administrator.
Enter Control panel/administration tools/Computer management/Disk Management and right-click on the drive's you like to be unseen. Click on the row with "change drive letter and path". Click on the drive letter you like to disappear and delete the drive letter.
Please note that if you plan to do this it's completely at your own risk. We're not responsible for any damage.
[ Back to Howtos ]
Loading Comments