CoolerMaster Cosmos case review
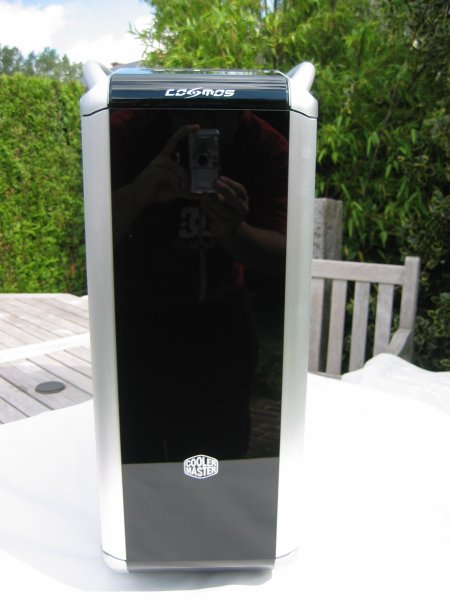
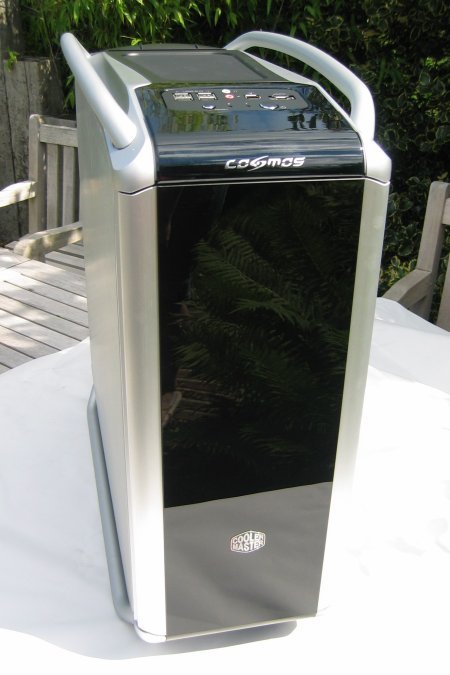
Cooler Master Cosmos exterior
As you can see the entire front of the Cosmos case is a door that hides all your CD/DVD players and other 5.25" or 3.5" devices. The door is made out of aluminum and features a stylish black plastic inset.
And here's a look at what's behind the door:
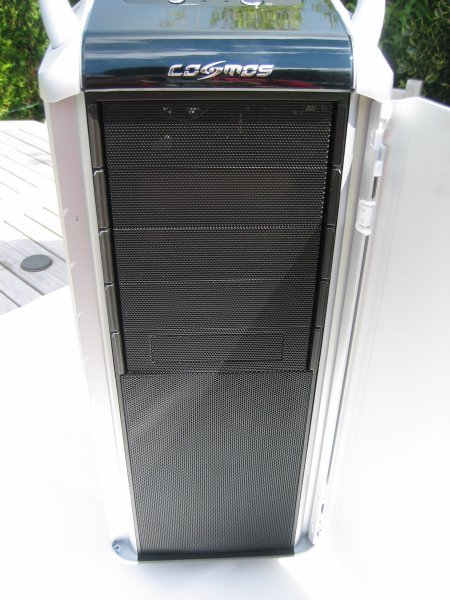
It's a big black plastic mesh that looks pretty good. You can install up to four 5.25" devices + a 3.5" device and the bay covers are very easy to remove. They have a tool-free design and it's also easy to put them back afterward should you decide to remove one of your 5.25" devices.
One of the special features of this case is that the opening direction of the door can be changed. By default, the door opens to the right but it's pretty easy to change this, only takes a minute or two. The front panel of the case features two magnets on the left and right side so the door won't accidentally open and the door also features two small pieces of rubber which ensure that the door won't slam too hard.
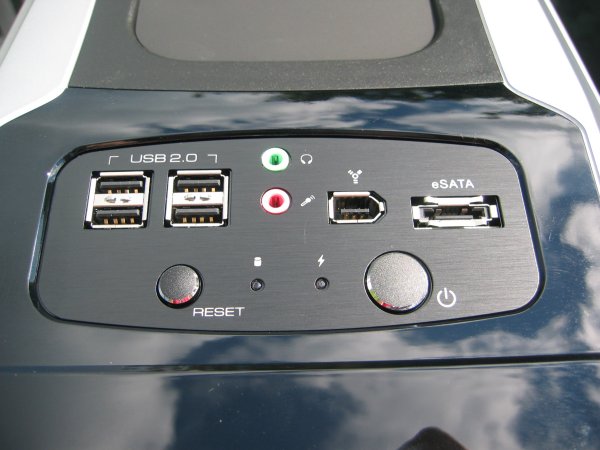
On top of the cases' front you'll find the I/O panel. It looks pretty good and features two black buttons for power and reset, HDD activity LED, power LED, four USB 2.0 connectors, a microphone input, headphone output, FireWire port and an external Serial ATA port.
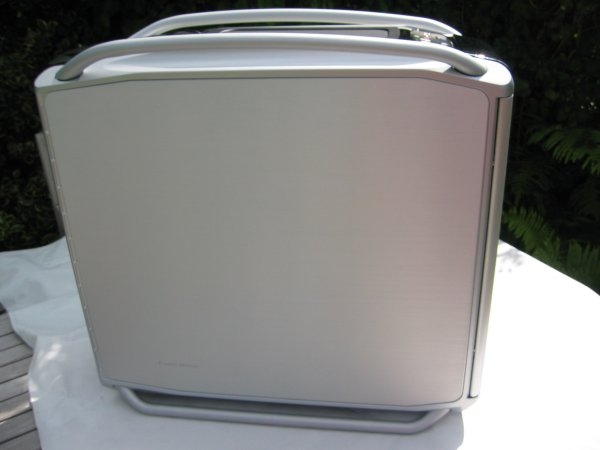
When you look at the sides you can see that the case rests on two aluminum bars. This raises the height of the case a bit and allows cool air to enter your case through the bottom intake fan. These handles are made out of aluminum and there are also two on top which can be used to lift the case up. Both side panels are very easy to remove, you just have to lift a lever on the back of the case.
This system is very convenient and one of the best I've ever seen. The outside of the side panels is made out of aluminum, while a small part of the other side of the panel is made out of steel.
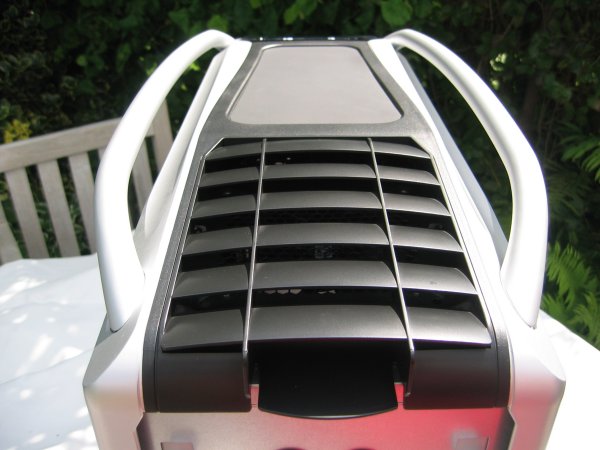
The entire top side of the case is made out of hard black plastic, this panel covers the ventilation grill of the two top 120mm fans. If you want better cooling it's also possible to install two 140mm fans as Cooler Master already drilled the holes for you.
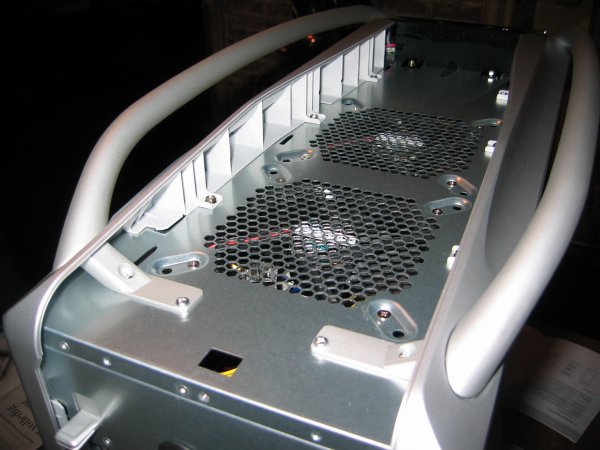
Now let's move on to the rear. On top, you'll find the two levers which are used to remove the side panels. In this photo you can also see that CoolerMaster made two holes in the back for watercooling tubes.
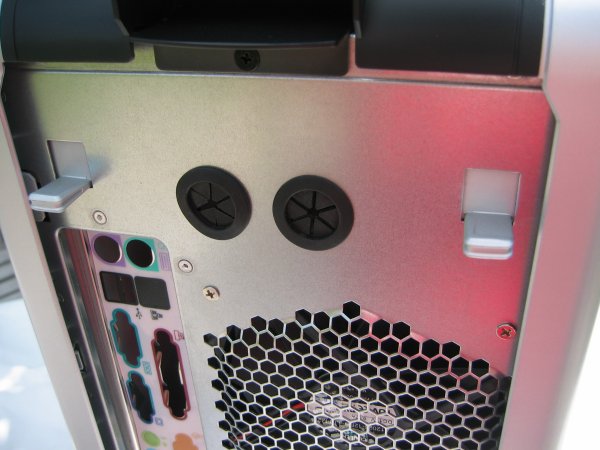
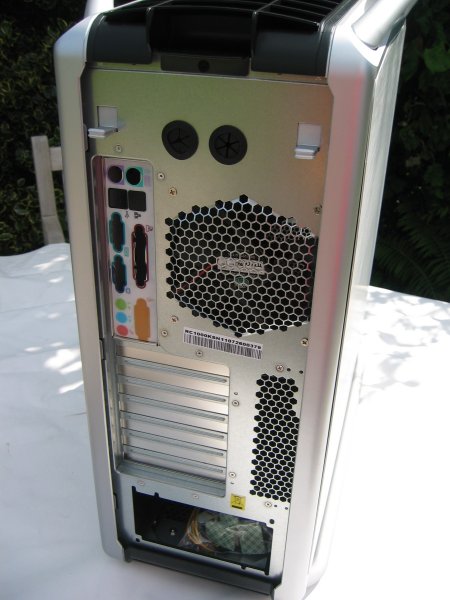
You can see that the case has one 120mm rear exhaust fan and a bit lower you can see the ventilation holes which are used to draw cool air to your graphics card, but more about that later. One of the more extraordinary things is that Cooler Master decided to put the power supply on the bottom of the case instead of on top.
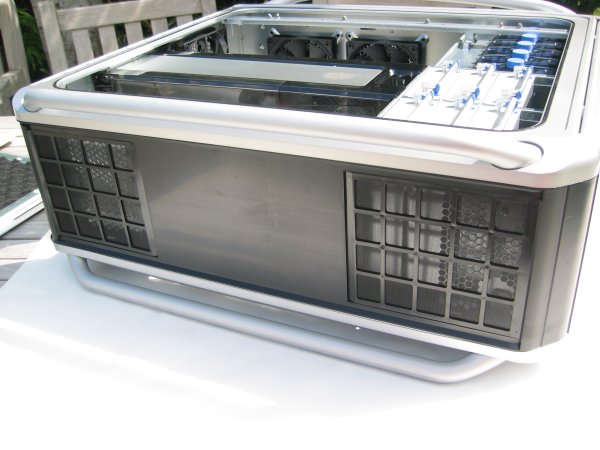
Mostly you can't really say a lot about the bottom of a case but with the Cosmos it's different. The bottom of the case features ventilation holes and dust filters for both the cases' intake fan and the one from your power supply. Just like most other parts of the case these dust filters are very easy to remove.
 Previous Page (1/5)
Added: July 21st 2007
Product reviewed: CoolerMaster Cosmos case
Reviewer: Thomas De Maesschalck
Score: 9/10
Page: 2/5