Skyhawk Galaxy Lx Case review
The front panel|
|
|
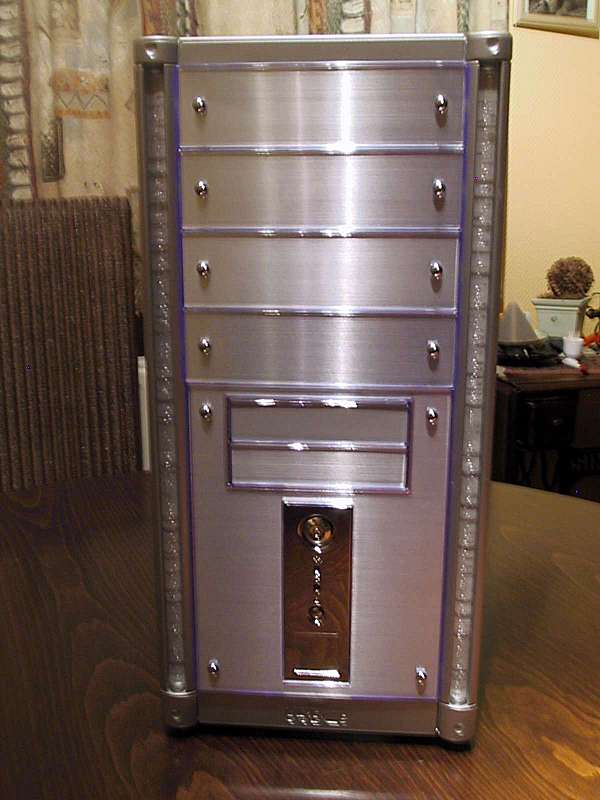

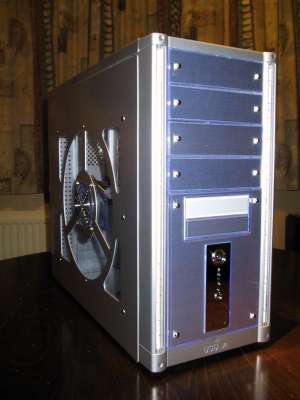
Nice design case isn't it! Made from shiny aluminium brushed plates. Now let's take a closer look on the front panel. It's made out of plastic and has a blue acrylic cover on it. Behind the acrylic plates they've put a small aluminium sheat so you'll get the impression that it's a shiny aluminium front panel. Under the 3.5" bays you have a small panel where you find the power button , the power LED and HDD activity LED and beneath those you have the reset button. Under the reset button there's a small place where you can put a case badge. It looks nice and has an 'mirroring' effect. On both the left and right side of the front panel are bubble tubes, more about those later in this review.
|
|
|
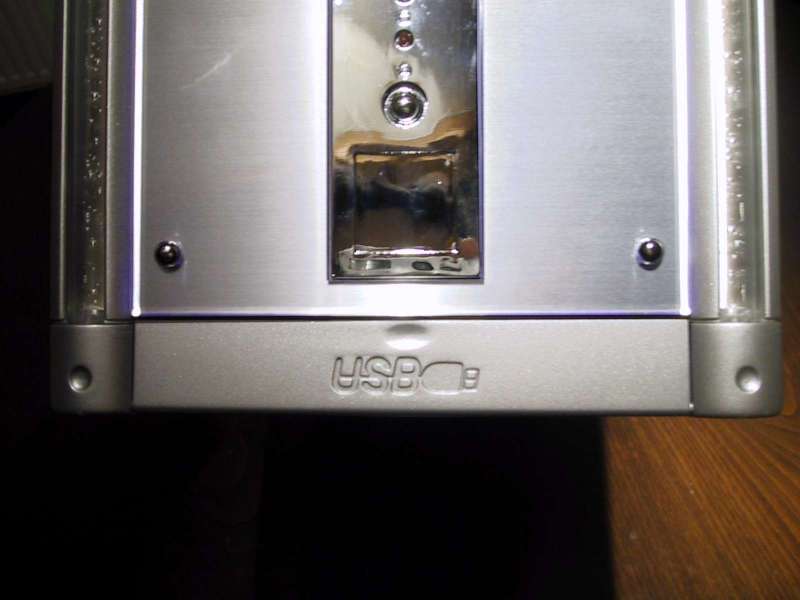

At the bottom of the front panel you'll find a panel with a bottom to stop the bubble lights from changing to another color. Optional you can choose to buy a panel with 2 USB, one Firewire and a micro and headphone port for this front panel.
The rear
|
|
|
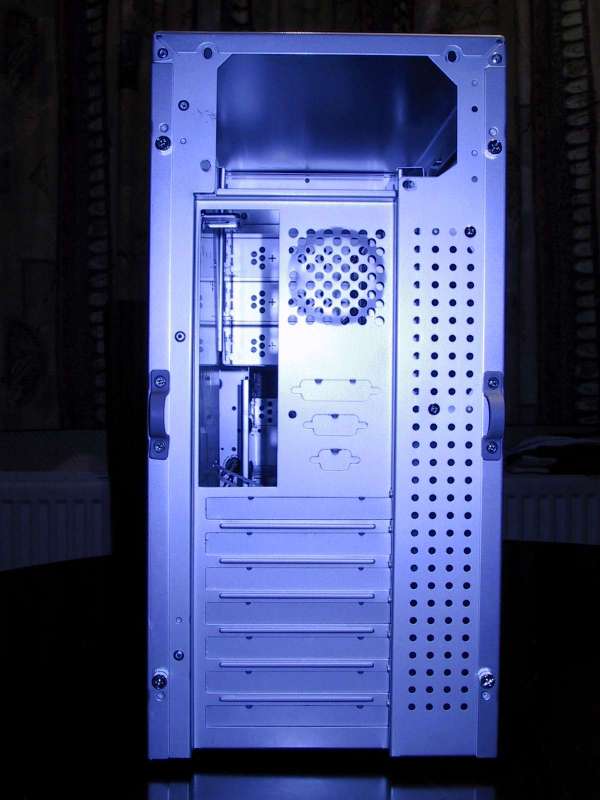
This is the back of this aluminium case. The side panels are both screwed with 2 tumb screws, it is nice to see this because it makes it easier to remove those side panels. To make this even easier Skyhawk has attached a plastic case handle to the sidepanels. Anyway in my opinion it would have been better if they used metal handles for this because the plastic doesn't look good between all the aluminium. There are a lot of holes on the right side to improve to airflow a little bit (and also to allow some dust to come in your case, which isn't a good thing) in the middle of it you'll see the screws from the 'CPU blower'. Even a place where you can put an 60mm fan (Do people even use those?, I think most people only have 80mm fans or bigger) In my opinion the backplate should have been a bit thicker because it isn't really giving me a solid impression. Oh and the PSU mounts upside down by the way, some people will like this because when you have a PSU with two fans in it than it will suck the hot air away from your mobo.
The inside
|
|
|
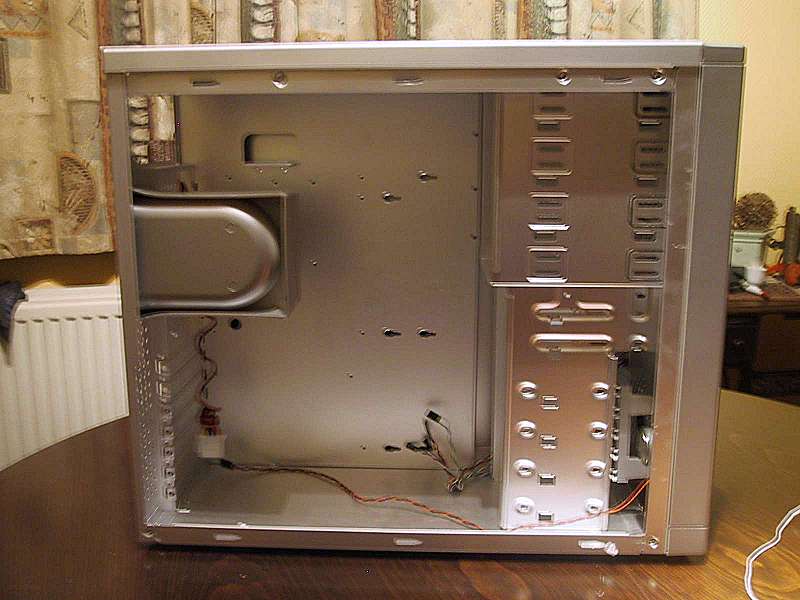
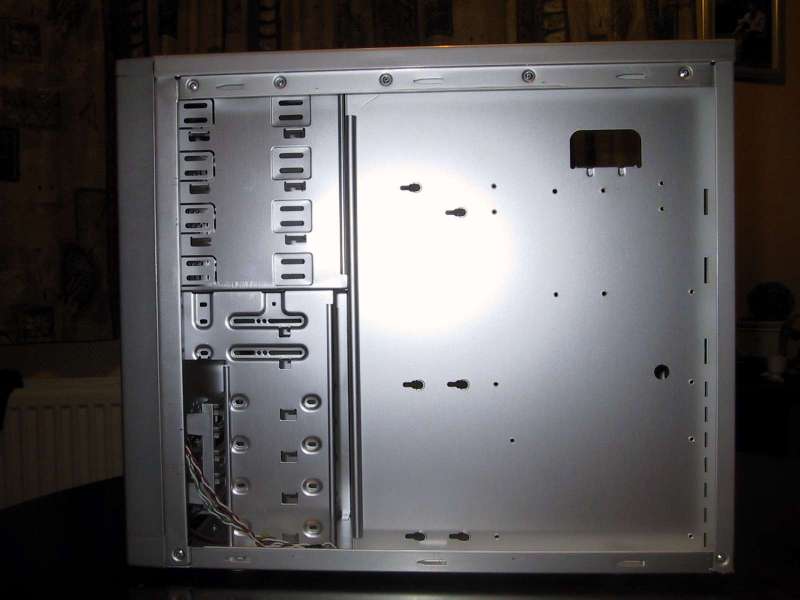
Now let's remove the side panel and have a closer look at the inside
|
|
|

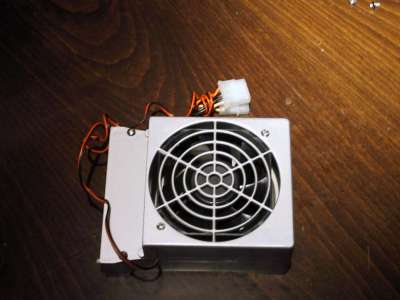
On of the first things that caught my attention was this CPU blower. It's an 80mm fan with male/female molex connector and it's used to suck the hot air away from your CPU or 3D Card. The housing of the 'CPU blower' is plastic, this looks a bit strange in an aluminium case, maybe they could have used alumnium as housing material for the CPU blower, that would have looked a lot better! The fan is screwed to the CPU blower housing with 2 screws on the front so if you want you can always change the fan with another one if you remove the housing which is attached with 4 screws. It's the PL80S12M fan from Power Logic. Here are some specs of it :
| Specifications of this fan : |
|
Bearing : Sleeve bearing Rated Voltage : 12V Rated current : 0.12A Rated input power : 1.44W Speed : 2500RPM Max Air flow : 26.99CFM Max static pressure : 4.29 mm-H2O Noise : 28.20dB Weight : 54g |
Overall it's just an average 80mm fan so you might want to put another fan in the 'CPU blower' to get maximum airflow.
|
|
|
|
|
|
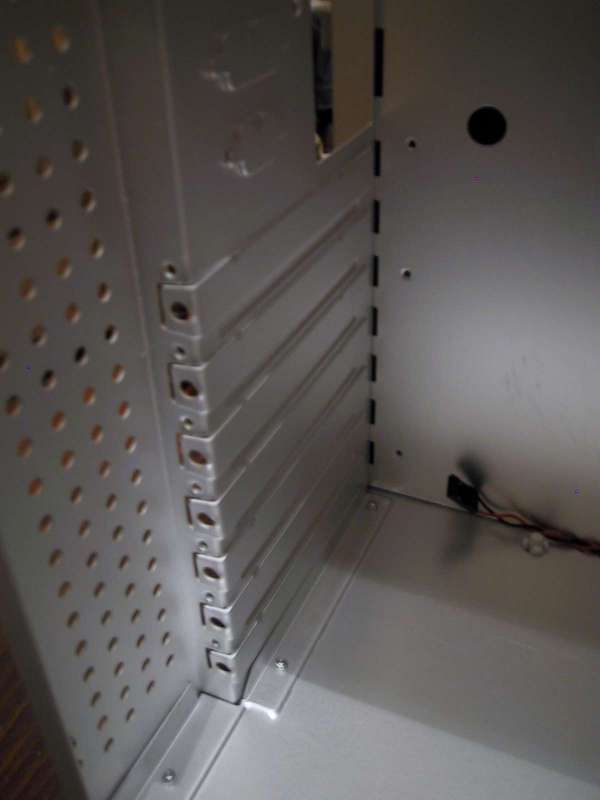
Ouwch take a look at the upper left pic, those PCI brackets aren't re-usable, so you better think twice before removing one of them or you'll have an ugly hole that allows a lot of dust to come in your case. Fortunately Skyhawk included 2 normal PCI brackets in a small box but still it's a bad choice that they've chosen to put PCI brackets in this case that aren't reusable
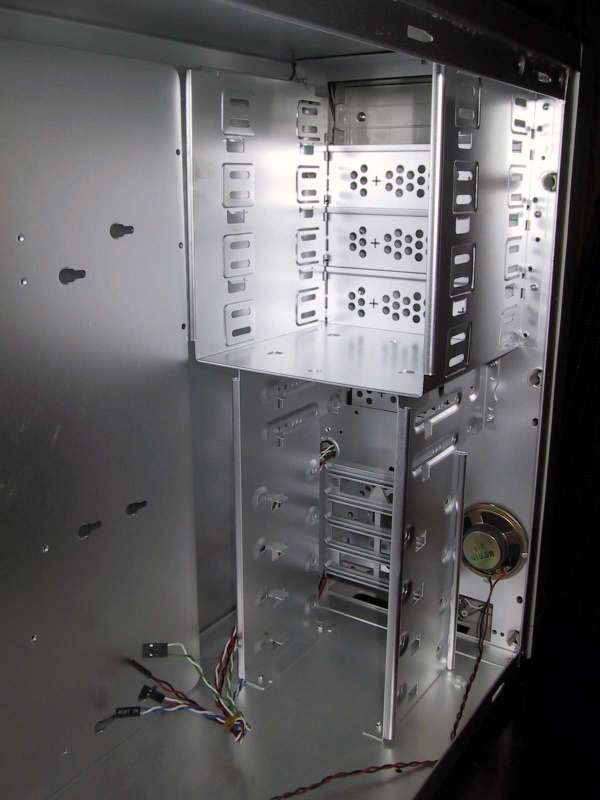
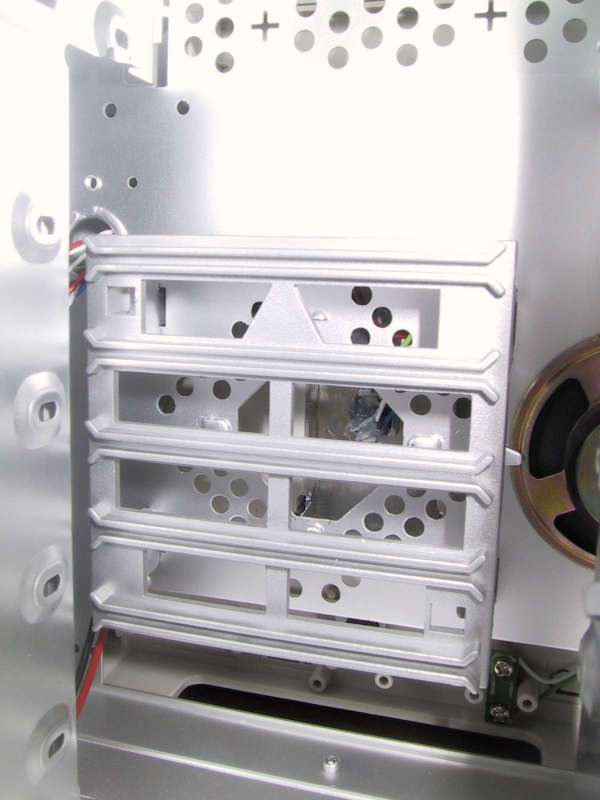
On the pic in the upper right you see four 5.25" drive bays, and six 3.5" bays (only 2 are visible from the outside). The bay covers of the drive bays are very easy to remove by pressing on 2 clips. Behind the 3.5" bays you see a place where you can mount a 80mm fan but that plastic grill in front of it is just blocking too much of it's airflow! On the left you see connectors for the power button , reset button , power LED and for the HDD activity LED.
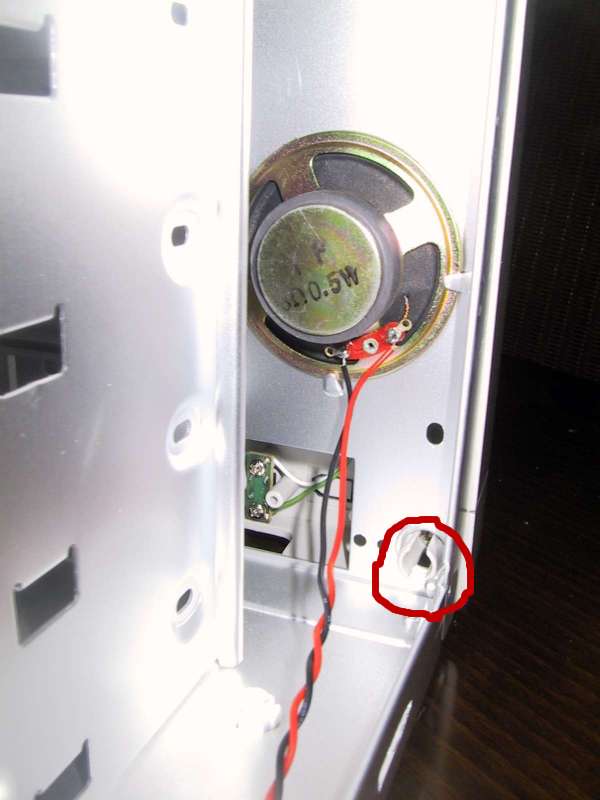
On the pic on the right you see that they've tryed to make it as easy as possible to remove the front panel with some pieces of plastic that you need to squeeze together (6 in total) but still it's quite hard because they aren't easy to reach. And also in this pic is the speaker.
The underside
|
|
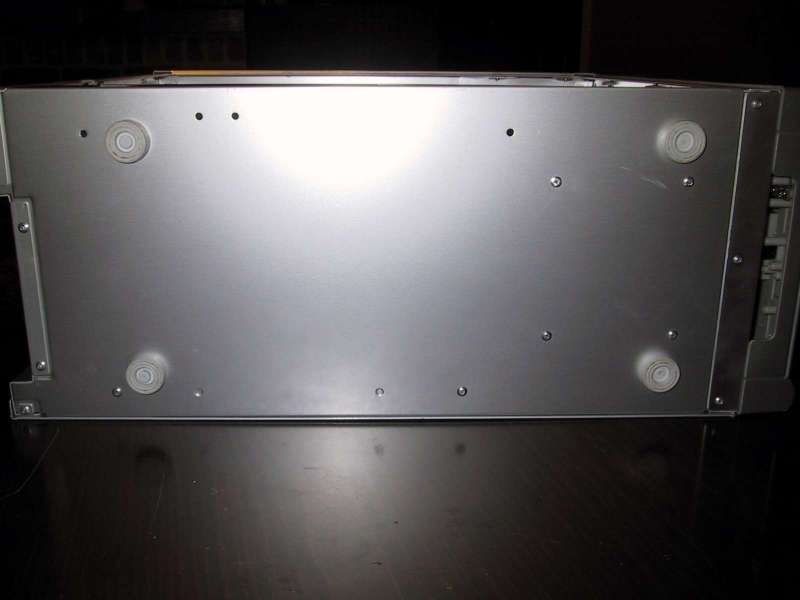
This is the underside, there isn't much to say about it except that it has 4 removable plastic feets to prevent slipping.
The front
|
|
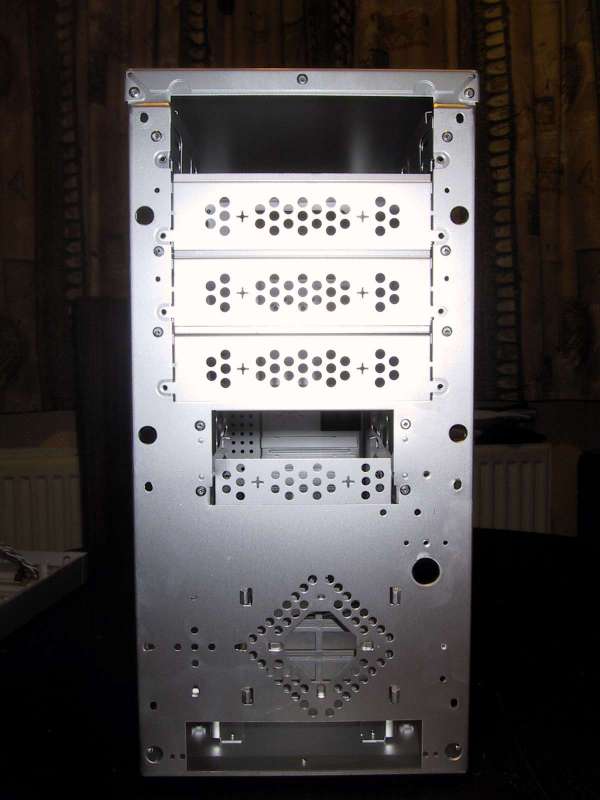
This is how the front looks without front panel, again there isn't mutch to say about it except that it has a few holes to allow some airflow.
The right side of the case
|
|
And this is how the right side of the case looks without side panel. The reason I'm showing you this is because there's a little bit of room there to hide some of the cables of your PSU that you don't use.
The Q-panel
|
|
|
|
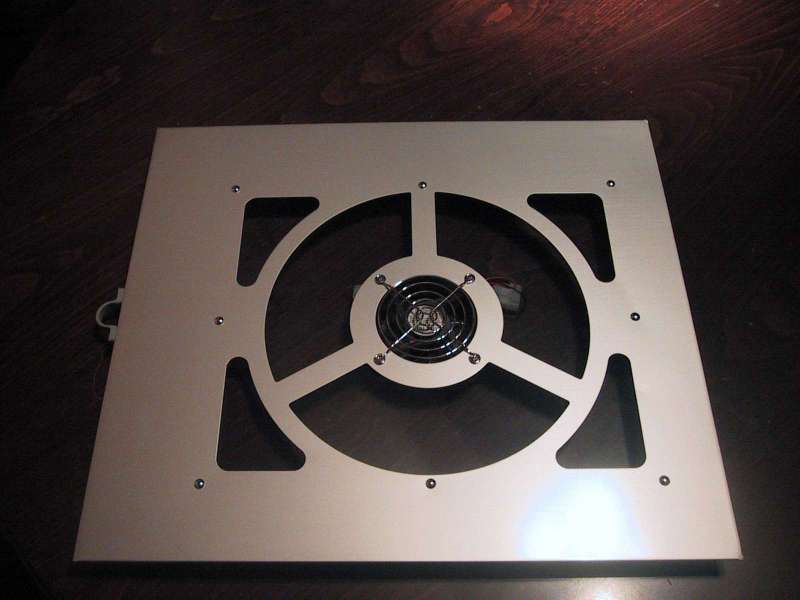
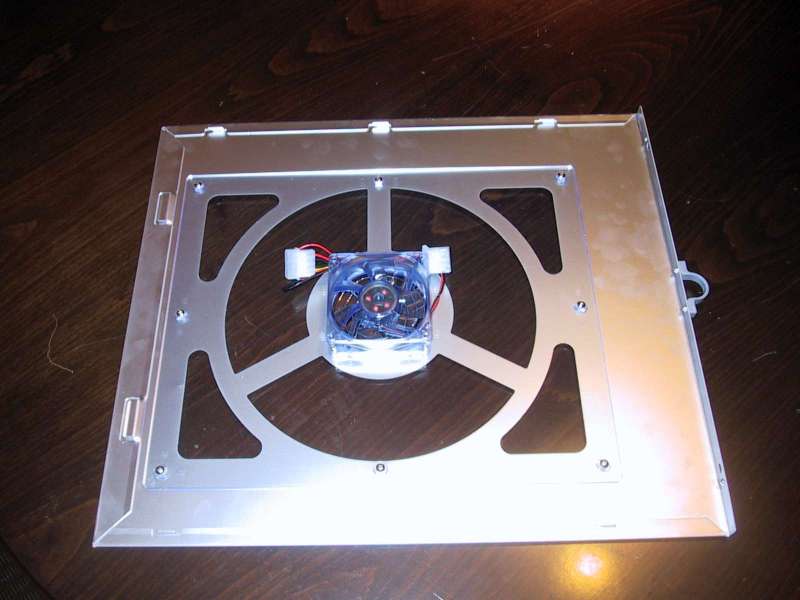
One of the optional things of this case is the cool looking Q-panel. It's a stylish looking side panel with a window and a 80mm fan in the middle of it. The window is made out of the same acrylic material of the front panel. There's fan attached in the middle of the Q-panel with a standard fan grill on it. The fan is the DFS802512L from Young Lin, it has a blue transparant colour and has male/female Molex connectors. Here are some of its specifications :
| Specifications of this fan : |
|
Bearing type : Sleeve bearing Rated voltage : 12V Rated current : 0.08A Speed : 2000RPM Airflow : 25.64CFM Static pressure : 1.64mmH2O Noise : 22.05dB So again not really a high performance fan with only 25.64CFM. |
 Previous Page (1/4)
Added: February 5th 2003
Product reviewed: Skyhawk Galaxy Lx Case
Reviewer: LSDsmurf
Score: 9/10
Page: 2/4