Logitech MX1000 Laser Cordless Mouse review

First look at the MX1000
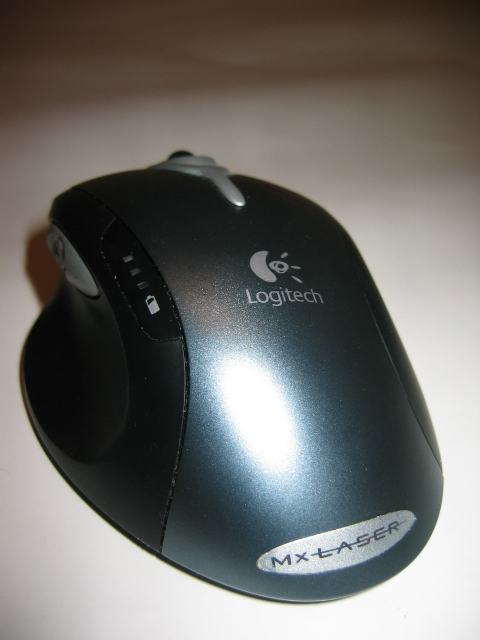
Compared to the old MX700 the MX1000 really looks better I think. The design of the MX1000 is more streamlined and it looks even more professional than the MX700. Logitech's new MX1000 has a really nice black/grey design. To be honest this is one of the nicest mouses I ever had in my hands.
Installation
Installing the Logitech MX1000 is plain simple. First, you need to plug the AC cable into the back of the base station. Then you plug the AC adapter into the outlet and put the MX1000 in its cradle so it can charge before usage. Also do not forget to turn on the MX1000, it has an on/off button on its back. Charging will take a few hours until all LEDs turn solid green.
Then you can move on. Plug out the cable of your old mouse and plug in the cable of the MX1000. Then boot up your pc and install the SetPoint software which is included on the CD-ROM.
A closer look at the MX1000
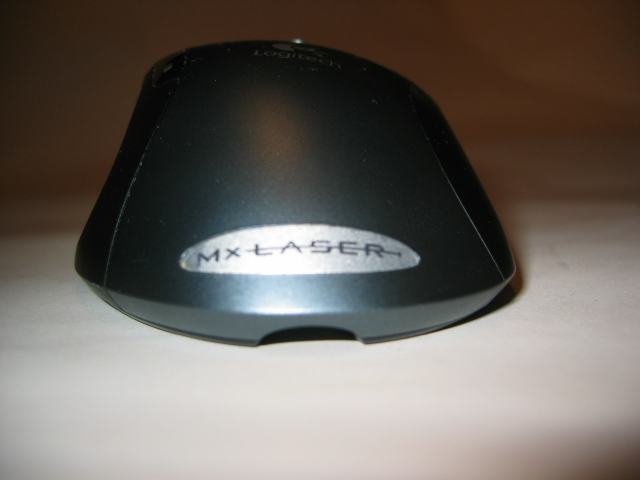
On the following photos you have a look at the MX1000. You can directly spot a few big differences compared to the MX700. The MX1000 has a slightly other shape with improved ergonomics and it's also a little bit bigger.

The buttons
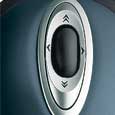
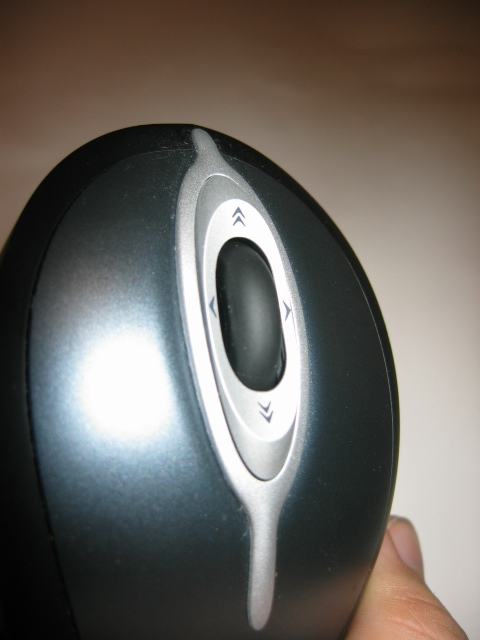
In the first picture, you can see the scroll wheel which can be tilted for horizontal scrolling. You can also click with it; clicking will allow you to zoom in or out with the wheel (only works in applications that support this). There's also a button above and under the scrolling wheel. These are dubbed "Cruise Control"-system and they allow you to quickly scroll through a document.
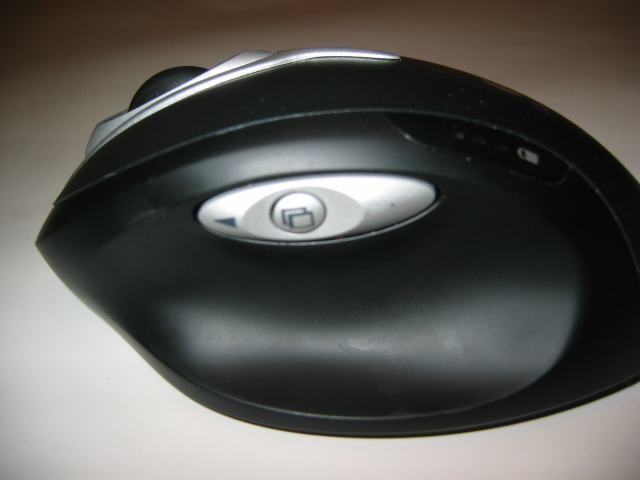
There are three buttons above the deep-sculped thumb support. The one in the middle is used to switch through applications and the other two are used for forward and back.
Note: Please be aware that these are only the standard functions. With the SetPoint software you can fully alter the functions to your own needs. For example, I don't like the back and forward functions, so I use them for minimizing and maximizing. With the Logitech SetPoint software you can fully customize each button to your own needs, the only buttons that can't be changed are the left and right-click buttons.
As you can see in the second photo the printed arrow on the right button, which I use for minimizing, is already worn-off after only a few weeks of usage! There used to be an arrow painted on this button just like on the other button (which I barely use). This is an issue that also occurred with my MX700. After a few weeks/months of heavy usage, the buttons tend to lose their symbols. I hope that Logitech can find a solution for this problem in a future revision of their mice.
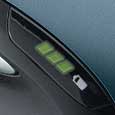
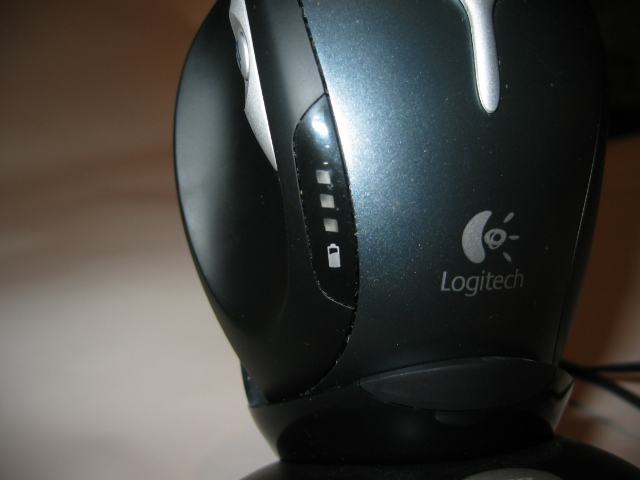
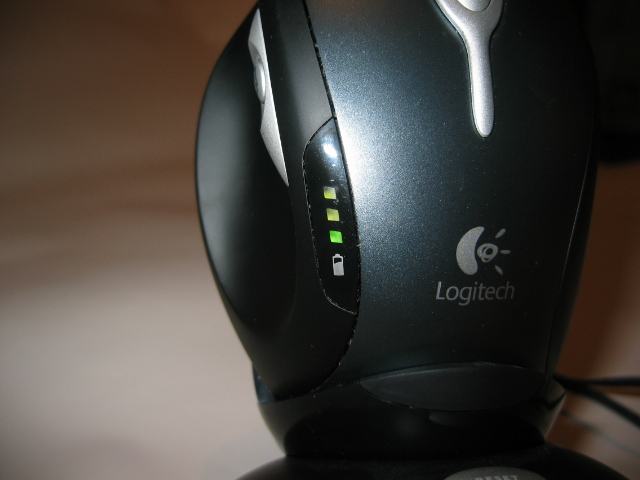
The Illuminated 4-level battery indicator
The next photos show one of the unique features of the MX1000, its Illuminated 4-level battery indicator. If the rechargeable lithium-ion battery is fully charged it will show 3 green blocks. When battery level gets lower it will switch to two green blocks and when it needs to be recharged it will switch to red. To reduce power usage these LEDs aren't always illuminated, they only lit when you move the mouse. They will dim about 5 seconds after you stop using the mouse.
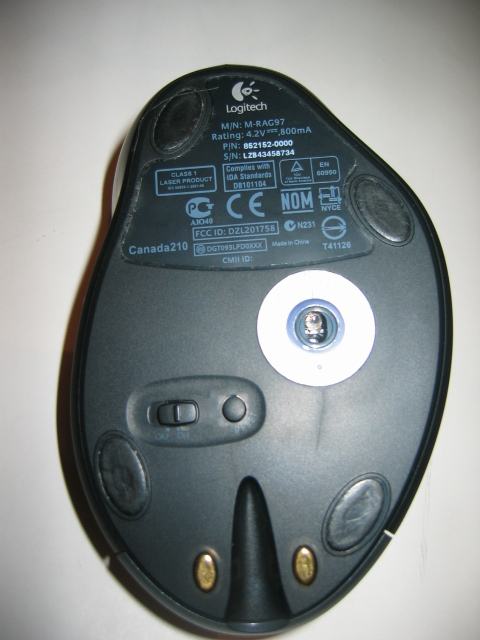
The underside of the MX1000
Now lets take a look at the underside of the MX1000.
Compared to the MX700 there are some diffences:
- The MX1000 has a built-in rechargeable lithium-ion battery which can not be removed. The MX700 used two AA rechargeable batteries.
- It's bigger. Especially the left is larger with its new thumb support.
- The MX1000 only has four mousefeets (the MX700 had five) but they are much bigger.
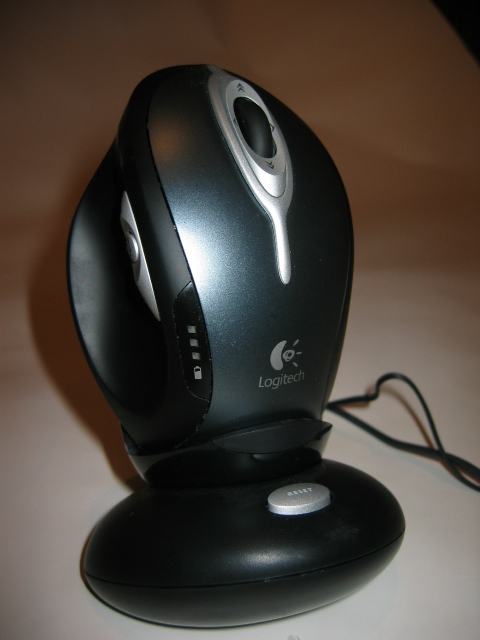
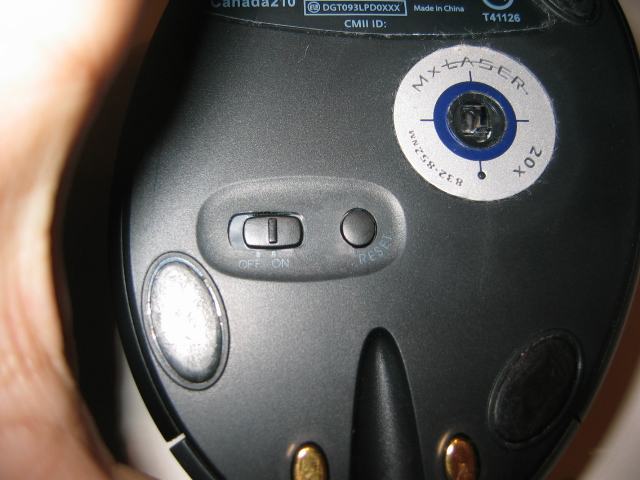
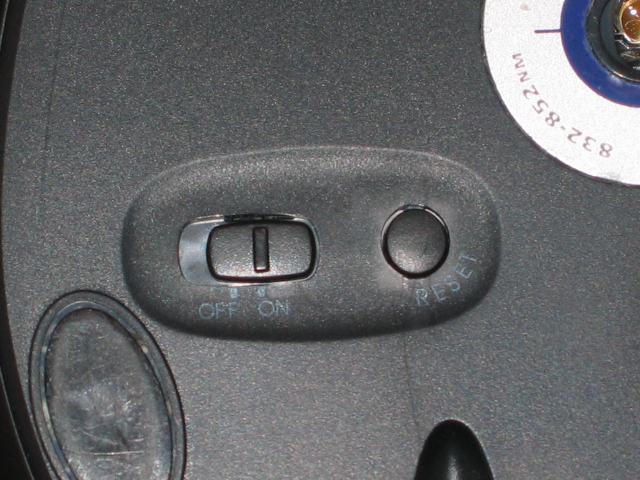
- The MX1000 has an on/off button. This is also a welcome new feature. Next to it is the reset button which is used to make a new connection with the receiver.
- The MX1000 still uses the same charging method as the MX700, the contact pins. This reminds me of my MX700 which after about 1.5 years of usage refused to load in its cradle because the contact points didn't made good contact with the charger no more. The contact points of the base of the MX1000 have changed a bit though, so lets hope that in the course of time this won't occur with the MX1000.
- And another thing that has changed is that the MX1000 uses a laser instead of the well-known red LED. In case you're wondering: the bottom of the MX1000 does not produce any (visible) light like other optical mice do. We'll all miss the goos ols red LED light ;-)
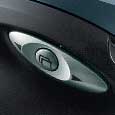
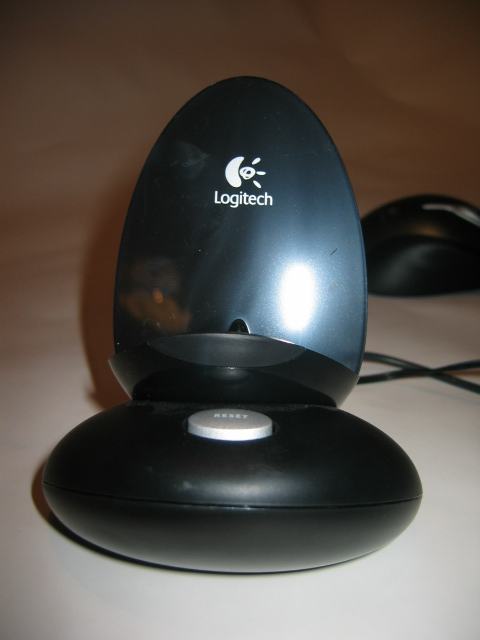
The base station
The black base station included with the MX1000 has two functions: it is used as a receiver and also acts as a recharger. It has a grey button that is used to make a new connection with the mouse. Compared to the cradle of the MX700 this one looks a bit flimsy with its thin back.
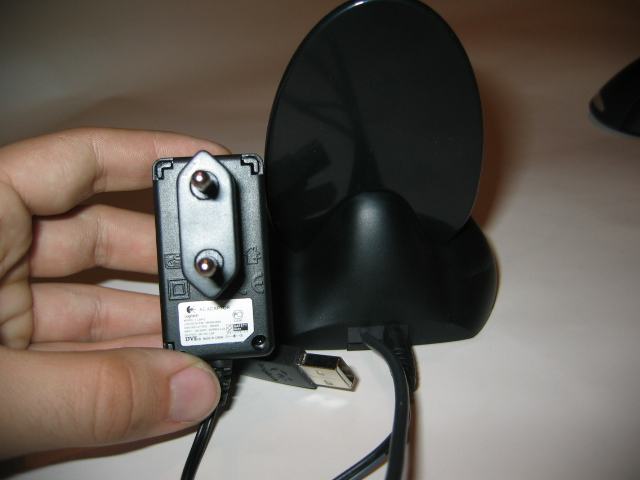
The second picture shows another improvement. The AC power adapter needs to be plugged into the back of the base station. This is a lot more easy than the system that the MX700 featured (the AC power adapter needed to be plugged into the USB connector, see for yourself here).
It would recommend you to recharge the MX1000 every night (or every 2 days) so that it never happens that the battery becomes empty when you are working on your PC (or playing some games).
The battery of the MX1000 lasts for about five days under heavy usage and it takes some time to fully recharge.
 Previous Page (1/3)
Added: November 3rd 2004
Product reviewed: Logitech MX1000 Laser Cordless Mouse
Reviewer: Thomas DM
Score: 9/10
Page: 2/3